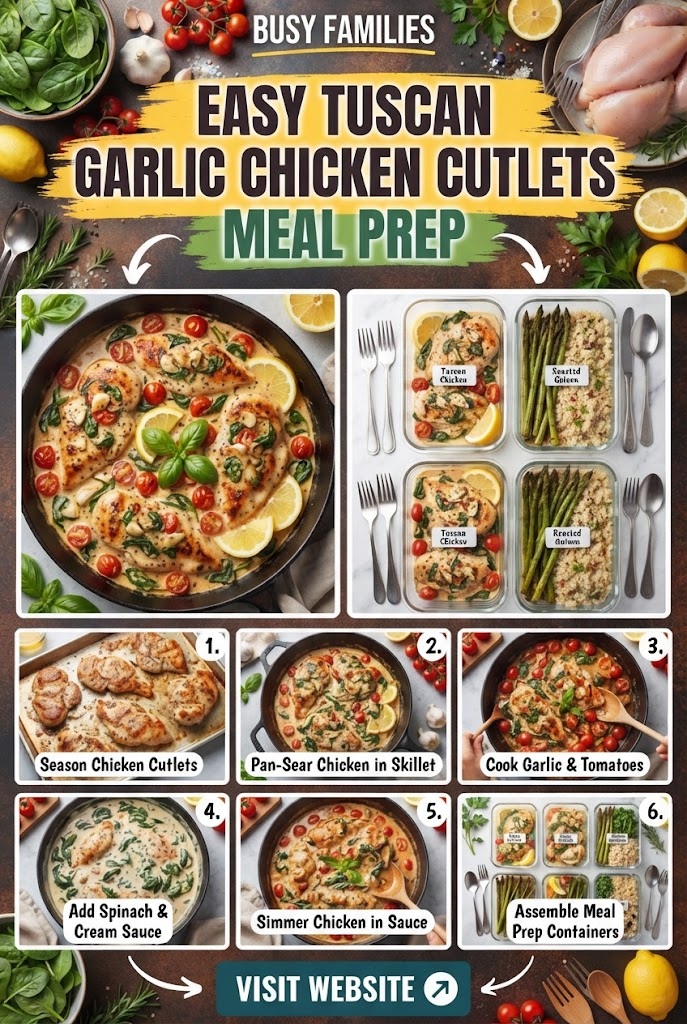
Cutlets Recipe for a Crowd-Pleasing Dinner: The Ultimate Guide to Juicy and Flavorful Results
The humble cutlet is a culinary masterpiece that transcends borders. Whether you call it a Schnitzel in Austria, Tonkatsu in Japan, Milanesa in Argentina, or a simple breaded cutlet in the United States, the appeal remains the same: a satisfyingly crunchy exterior giving way to a tender, juicy interior.
Creating the perfect cutlet is often seen as a basic kitchen skill, but there is a profound difference between a mediocre, dry cutlet and a world-class, crowd-pleasing dinner. To achieve the latter, one must understand the science of breading, the importance of temperature control, and the secrets to internal moisture. This comprehensive guide will walk you through every nuance of the cutlet-making process, ensuring that your next dinner party or family gathering is met with resounding praise.
The Anatomy of a Perfect Cutlet
Before we dive into the ingredients and steps, we must understand what makes a cutlet successful. A perfect cutlet relies on three pillars:
- Texture Contrast: The “crunch” must be audible. This is achieved through a multi-stage breading process and high-quality crumbs.
- Internal Juiciness: Because cutlets are thin, they are prone to overcooking. We use techniques like pounding and brining to ensure the meat stays succulent.
- Seasoning Depth: Flavor shouldn’t just be in the meat; it needs to be layered into the flour, the egg wash, and the breadcrumbs.
Ingredient Details in Form Shape
To ensure your preparation is organized, use the following structured table to gather your components. This “form shape” layout helps you visualize the three distinct stations required for the standard breading procedure.
| Category | Item | Specification | Purpose |
|---|---|---|---|
| The Protein | Chicken Breast or Pork Loin | 1.5 lbs, sliced into medallions | The heart of the dish; provides the base flavor. |
| The Marinade | Kosher Salt & Black Pepper | To taste | Basic seasoning to enhance meat flavor. |
| Garlic Powder & Onion Powder | 1 tsp each | Adds savory depth to the protein itself. | |
| Lemon Juice | 1 tbsp | Tenderizes the fibers and adds brightness. | |
| Station 1: Flour | All-Purpose Flour | 1 cup | Dries the meat surface so the egg can stick. |
| Smoked Paprika | 1/2 tsp | Adds a hint of color and earthiness. | |
| Station 2: Liquid | Large Eggs | 3 units, beaten | Acts as the “glue” for the breading. |
| Dijon Mustard | 1 tbsp | Adds tang and helps the egg adhere better. | |
| Heavy Cream or Milk | 2 tbsp | Thins the egg for an even, non-clumpy coating. | |
| Station 3: Breading | Panko Breadcrumbs | 1.5 cups | Provides the ultimate “airy” crunch. |
| Italian Breadcrumbs | 0.5 cup | Adds fine texture and traditional herbal notes. | |
| Parmesan Cheese | 1/2 cup, finely grated | Creates a savory, salty crust. | |
| Fresh Parsley | 2 tbsp, finely chopped | Adds freshness and visual appeal. | |
| Cooking Fat | Neutral Oil (Grapeseed/Canola) | As needed for shallow frying | High smoke point for consistent browning. |
| Unsalted Butter | 2 tbsp (optional) | Added at the end for a rich, nutty finish. |
Equipment Needed
- Meat Mallet: Essential for evening out the thickness of the protein.
- Plastic Wrap or Parchment Paper: To protect the meat while pounding.
- Three Shallow Bowls/Trays: For the flour, egg, and breadcrumb stations.
- Large Cast Iron or Heavy-Bottomed Skillet: For even heat distribution.
- Wire Cooling Rack: To prevent the bottom of the cutlets from getting soggy after cooking.
- Instant-Read Meat Thermometer: To ensure perfect doneness without overcooking.
Step-by-Step Recipe Detail
Phase 1: Preparation and Tenderizing
The most common mistake in making cutlets is skipping the preparation of the meat. If the meat is of uneven thickness, the thin parts will dry out before the thick parts are cooked.
- Slicing: Take your chicken breast or pork loin and slice it across the grain into 1/2-inch thick pieces.
- Pounding: Place a piece of meat between two sheets of plastic wrap. Using the flat side of a meat mallet, gently but firmly pound the meat starting from the center and moving outward. Your goal is a uniform 1/4-inch thickness.
- Seasoning: Sprinkle both sides of the pounded meat with salt, pepper, garlic powder, and a squeeze of lemon. Let it sit for 10–15 minutes. This acts as a “dry brine,” drawing moisture into the cells.
Phase 2: The Triple-Coating Process (The “Standard Breading Procedure”)
Organization is key here. Set up your three bowls in a row: Flour -> Egg -> Breadcrumbs.
- Dredge in Flour: Coat the meat lightly in the seasoned flour. Shake off every bit of excess. You only want a thin “dusting.” If there is too much flour, the breading will peel off in the pan.
- Dip in Egg Wash: Submerge the floured meat into the egg, mustard, and cream mixture. Ensure it is fully coated, then lift it and let the excess drip off.
- Press into Breadcrumbs: Lay the meat into the Panko/Parmesan mixture. Press down firmly with your palms. You want to “embed” the crumbs into the egg wash to ensure a thick, sturdy crust that won’t flake off.
Phase 3: The Chilling Secret (Optional but Recommended)
Place the breaded cutlets on a tray and refrigerate them for 20 minutes. This allows the gluten in the flour and the proteins in the egg to set, creating a stronger bond between the meat and the crust.
Phase 4: Frying to Perfection
- Heat the Oil: Fill your skillet with about 1/4 inch of oil. Heat it over medium-high heat.
- Test: Drop a breadcrumb into the oil. If it sizzles immediately, it’s ready.
- The Sizzle: Lay the cutlets into the pan, moving away from you to avoid oil splashes. Do not crowd the pan; work in batches.
- Gold Standard: Fry for about 3–4 minutes per side. Look for a deep, golden-brown color.
- The Butter Baste: In the last minute of cooking, add a knob of butter to the pan. Let it foam and spoon it over the cutlets for an infusion of flavor.
- Resting: Immediately move the cutlets to a wire rack. Season with a tiny pinch of flaky sea salt while still hot. Let them rest for 3 minutes before serving.
Helpful Cooking Tips for Juicy and Flavorful Results
1. The Importance of Uniformity
The primary reason cutlets turn out dry is “heat lag.” If one side of a chicken breast is an inch thick and the other is a quarter-inch, the thin side will be cardboard by the time the thick side is safe to eat. Always use a mallet. If you don’t have a mallet, a heavy rolling pin or the bottom of a small cast-iron skillet works perfectly.
2. Don’t Skimp on the Oil
Many home cooks try to “healthify” cutlets by using very little oil. This results in uneven browning and a greasy texture because the breading absorbs the oil rather than being seared by it. Shallow frying requires the oil to come halfway up the side of the cutlet. This creates steam inside the breading, which pushes outward, preventing the oil from soaking into the meat.
3. Temperature Management
If your oil is too cold, the breading will act like a sponge and soak up grease. If it’s too hot, the outside will burn before the inside is cooked. Aim for an oil temperature of 350°F (175°C). If you see the oil smoking, it’s too hot—remove the pan from the heat immediately.
4. The “Dry Hand, Wet Hand” Technique
To avoid “club hand” (where your fingers become breaded along with the meat), use your left hand for dry ingredients (flour and breadcrumbs) and your right hand for wet ingredients (egg wash). This keeps the process clean and efficient.
5. Enhancing the Breading
For a truly “crowd-pleasing” result, flavor the breading layers:
- The Flour Layer: Add zest of a lemon or a pinch of cayenne pepper.
- The Egg Layer: Add a dash of hot sauce or Worcestershire sauce.
- The Crumb Layer: Use freshly grated Pecorino Romano or even crushed pretzels for a unique twist.
Variations of the Classic Cutlet
While the standard chicken cutlet is a favorite, the technique can be applied to various proteins and even vegetables.
The Japanese Tonkatsu (Pork)
Use thick-cut pork loin chops. The Japanese method emphasizes a very thick coating of Panko. It is typically served with a shredded cabbage salad and a thick, savory-sweet Tonkatsu sauce made from ketchup, Worcestershire, and soy sauce.
The Austrian Wiener Schnitzel (Veal)
Traditionally made with veal, this version uses very fine, plain breadcrumbs (no herbs or cheese). The goal is a “soufflé” crust—where the breading actually puffs up away from the meat. This is achieved by swirling the pan constantly while frying so the hot oil washes over the top of the meat.
The Vegetarian Eggplant Cutlet
Peel and slice eggplant into rounds. Salt them and let them sit for 30 minutes to draw out bitterness. Pat dry, then follow the standard breading procedure. These make an incredible base for Eggplant Parmesan.
The Fish Cutlet
Firm white fish like cod or tilapia can be breaded this way. However, because fish cooks very quickly, ensure the oil is slightly hotter to brown the crust before the fish becomes over-faked.
The Science of Juiciness: Why Brining Matters
If you have the time, a quick wet brine can transform your cutlets. Dissolve 1/4 cup of salt and 1/4 cup of sugar in 4 cups of water. Submerge your pounded meat for 30–60 minutes.
Why it works: The salt denatures the meat proteins, causing them to unwind and form a matrix that traps water. Even if you slightly overcook the meat in the pan, the extra moisture trapped by the brine keeps the cutlet succulent. Just be sure to pat the meat extremely dry before starting the flour dredge, or the breading won’t stick.
Troubleshooting Common Issues
“My breading falls off the meat!”
This is the most common complaint. It usually happens for two reasons:
- Moisture: The meat was too wet when it hit the flour. Always pat the meat dry with paper towels.
- Steam: If you put the hot cutlet directly onto a plate, the steam from the meat softens the breading, causing it to detach. Always use a wire rack.
“The meat is tough.”
This is usually due to the “grain.” When slicing your meat, look for the direction of the muscle fibers. Slice across those fibers. This shortens the protein strands, making them much easier to chew.
“The crust is burnt, but the meat is raw.”
Your heat is too high. If the breading is browning too fast, turn the heat down and add a tablespoon of room-temperature oil to the pan to quickly lower the temperature. You can also finish the cutlets in a 350°F oven for 5 minutes if the crust is perfect but the interior is under 165°F.
Serving Suggestions for a Crowd
A cutlet is a versatile star that pairs well with almost anything. To make it a “crowd-pleasing dinner,” consider these plating options:
- The Italian Way: Serve over a bed of arugula tossed in lemon and olive oil, topped with shaved Parmesan and cherry tomatoes. The acidity of the salad cuts through the richness of the fried meat.
- The Comfort Way: Serve alongside garlic mashed potatoes and a creamy mushroom gravy.
- The Sandwich Way: Place the cutlet on a toasted brioche bun with spicy mayo, pickles, and shredded lettuce.
- The “Parm” Way: Top the fried cutlets with marinara sauce and mozzarella, then broil until the cheese is bubbly.
Storage and Reheating Tips
Cutlets are best eaten fresh, but they can be stored.
- Fridge: Keep in an airtight container for up to 3 days.
- Freezer: You can freeze breaded (but uncooked) cutlets. Place them on a baking sheet to freeze individually, then transfer to a bag. Fry directly from frozen, adding 2 minutes per side.
- Reheating: Never use a microwave—it will make the breading soggy. Reheat in a 375°F (190°C) oven or an air fryer for 4–5 minutes until the crust crisps up again.
Final Thoughts on Mastering the Cutlet
The journey to the perfect cutlet is one of precision and patience. By focusing on the “form shape” of your ingredients, maintaining strict temperature control, and using the right breading techniques, you elevate a simple meal into a gourmet experience.
Remember, the kitchen is a laboratory. Don’t be afraid to experiment with the spices in your flour or the type of cheese in your crumbs. Whether you are cooking for a quiet Monday night or a festive Sunday dinner, these tips and the detailed step-by-step recipe will ensure your results are always juicy, flavorful, and undeniably golden.
Enjoy the crunch!